Choosing the Right Lawnscapes Landscape Mulch Edging for Your Yard
If your garden beds tend to blend into your lawn, or your mulch consistently spills where it shouldn’t, we know how frustrating that can be. Achieving a neat and tidy landscape often feels like a constant battle against nature.
This is where effective landscape mulch edging becomes invaluable. It’s more than just a decorative border; it’s a practical solution that brings definition, helps control weeds, retains essential moisture, and prevents soil erosion. It’s a crucial element for any gardener seeking to enhance curb appeal and simplify maintenance.
Whether you’re aiming for crisp, clean lines or a more natural boundary, understanding the right approach to Lawnscapes landscape mulch edging is key to a beautiful and low-maintenance yard.
In this extensive guide, we will explore everything you need to know about choosing, installing, and maintaining the perfect edging for your garden beds. We’ll cover various material options, installation techniques, and how to keep your mulch exactly where it belongs.
Selecting the appropriate edging for your landscape involves weighing several factors: the material’s lifespan, its cost per linear foot, the desired aesthetic finish, its ability to retain soil, and its resistance to environmental factors like frost heave. The goal is to find a solution that not only looks good but also performs its critical functions effectively.
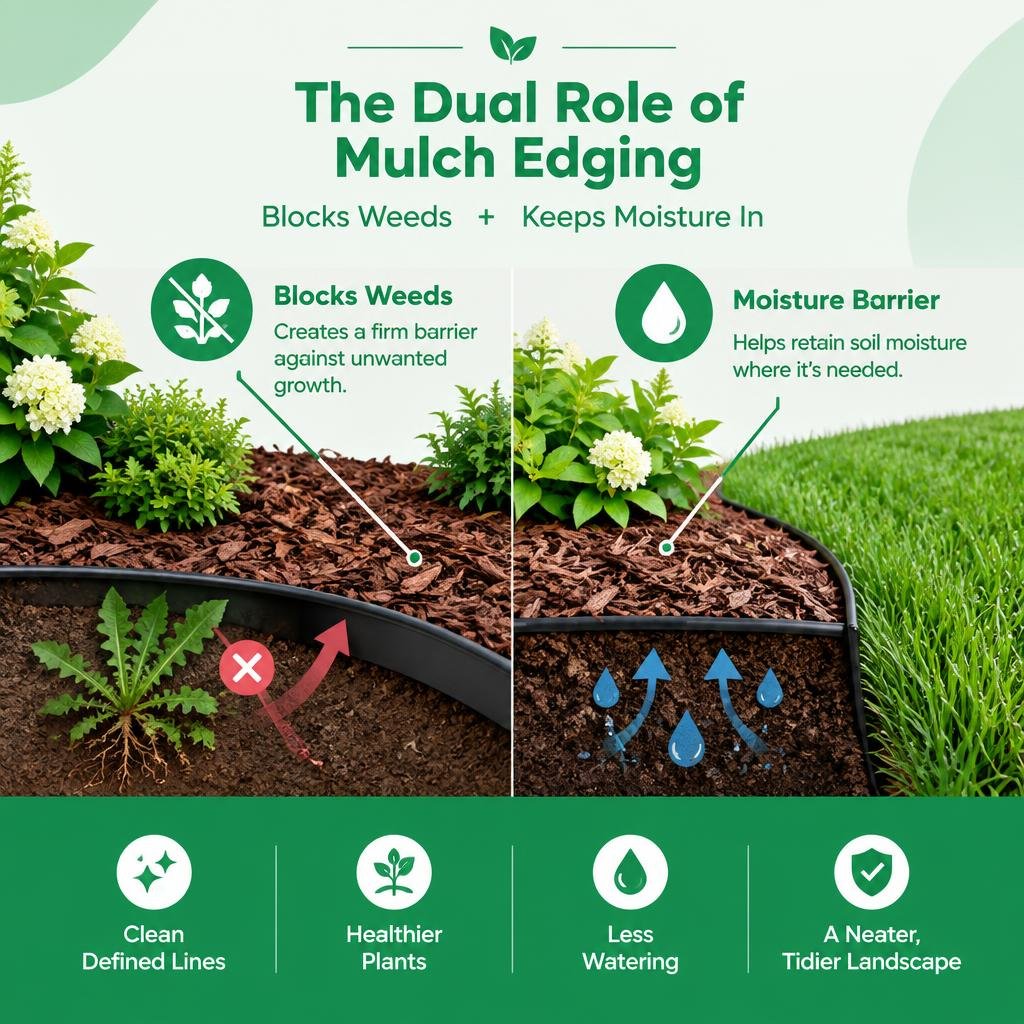
Edging serves a dual purpose in your landscape. It acts as a physical barrier, preventing mulch from migrating into your lawn or pathways, and it creates a clean, defined line that enhances the overall appearance of your garden beds. Beyond aesthetics, it can significantly contribute to weed suppression by creating a clear boundary against turfgrass and helps retain precious moisture in the soil, reducing the need for frequent watering.
When considering options for your property, it’s helpful to compare the various types available based on their performance and characteristics.
Edging Material Cost per Linear Foot (approx.) Lifespan (approx.) Key Characteristics Plastic (No-Dig) $0.50 – $1.50 5 – 10 years Flexible, easy to install, prone to frost lift, UV degradation Recycled Rubber $1.50 – $3.00 8 – 12 years Flexible, durable, safe for play areas, eco-friendly Steel $2.00 – $5.00 20 – 30 years Strong, clean lines, can rust, professional look, sharp edges Aluminum $2.50 – $6.00 25 – 40 years Rust-proof, lightweight, flexible, sustainable, clean lines Stone, Brick, Pavers $5.00 – $15.00 25+ years Durable, natural aesthetic, formal look, higher installation cost Spade-Cut Trench $0 (materials) Seasonal Natural, cost-free, requires regular maintenance Evaluating Materials for Lawnscapes Landscape Mulch Edging
Each material brings its own set of advantages and considerations to the table:
- Corten Steel: This material is celebrated for its distinctive rustic appearance, which develops as it weathers and forms a protective rust layer. It’s incredibly durable, offering a professional, clean line that can last decades. While it provides a strong, rigid border, some users note its sharp edges can be a concern, especially in areas with young children.
- Aluminum Alloy: Aluminum is a favorite for its longevity and low maintenance. It won’t rust, warp, or degrade from UV exposure, making it an excellent long-term investment. Its flexibility allows for elegant curves, and its lightweight nature simplifies installation. Commercial-grade aluminum, like 6063 alloy, is also a sustainable choice, often qualifying for LEED points due to its recyclability.
- Recycled Plastic (HDPE): Products made from recycled high-density polyethylene (HDPE) offer an eco-friendly and often more budget-conscious solution. They are flexible, easy to install without heavy tools, and resistant to UV and temperature fluctuations. While generally durable, their lifespan is typically shorter than metal options, and some plastic edgings can be prone to frost heave, causing them to lift out of the ground over winter.
- Natural Stone, Brick, or Pavers: For a classic, formal, or rustic aesthetic, natural stone, brick, or concrete pavers are excellent choices. They are incredibly durable, often lasting 25 years or more, and provide a substantial, permanent border. The cost can be higher due to material expense and more intensive installation, but the timeless look and robustness are often worth the investment. Travertine edging, for example, offers a beautiful finish but requires regular sealing to prevent staining.
- Recycled Rubber Borders: These options are gaining popularity for their flexibility, safety, and environmental benefits. Made from recycled tires, they are soft, making them ideal for play areas, and can conform to various shapes. They offer good durability, typically lasting 8 to 12 years, and provide a robust barrier for mulch.
When making your selection, consider the overall design of your landscape, the amount of foot traffic the area receives, and your long-term maintenance preferences. For example, if you’re looking for a solution that combines the aesthetic of wood with the durability of plastic, recycled HDPE edging designed with a wood grain texture can offer the best of both worlds.
Traditional Spade-Cut Trenching vs. Physical Barriers
Before diving into manufactured edging products, it’s worth considering the traditional spade-cut trench, a zero-material method that provides a surprisingly effective border. This technique involves cutting a clean, V-shaped groove along the edge of your bed, creating a natural barrier that helps contain mulch and defines the bed line.
- Advantages of Spade-Cut Trenching:
- Cost-Effective: Requires no material cost, only manual labor.
- Natural Aesthetic: Blends seamlessly with any landscape style, offering an organic look.
- Flexibility: Easily adjusted to any curve or shape.
- Root Barrier: A properly cut trench can deter turfgrass roots from encroaching into your beds.
- Disadvantages:
- Maintenance: Requires regular recutting—typically once or twice a season—to maintain its crisp line and effectiveness.
- Less Defined: May not provide the same sharp, architectural line as some physical barriers.
- Limited Mulch Retention: While effective, it may not contain mulch as rigorously as a solid physical barrier, especially on slopes or in heavy rain.
For those who prefer a more permanent, lower-maintenance solution, physical barriers offer superior mulch retention and a consistently crisp edge. While they involve an initial material and installation cost, their long lifespan and reduced need for seasonal recutting can make them a more economical choice over time. The decision often comes down to balancing initial investment with ongoing maintenance and your preferred aesthetic.
Step-by-Step Installation and Depth Guidelines
Proper installation is paramount to the effectiveness and longevity of your landscape mulch edging. Whether you opt for a no-dig plastic strip or a more robust metal solution, following key steps will ensure your edging performs as intended.
For many homeowners and landscapers, achieving a professional finish with Lawnscapes landscape mulch edging begins with careful planning and execution. This ensures that the edging not only looks great but also functions optimally to retain mulch and prevent grass encroachment.
Installing Lawnscapes Landscape Mulch Edging Step by Step
- Mark the Layout: Begin by outlining your desired bed shape. A garden hose, rope, or even spray paint can help you visualize and adjust the curves until you achieve the perfect design. For straight lines, use stakes and string.
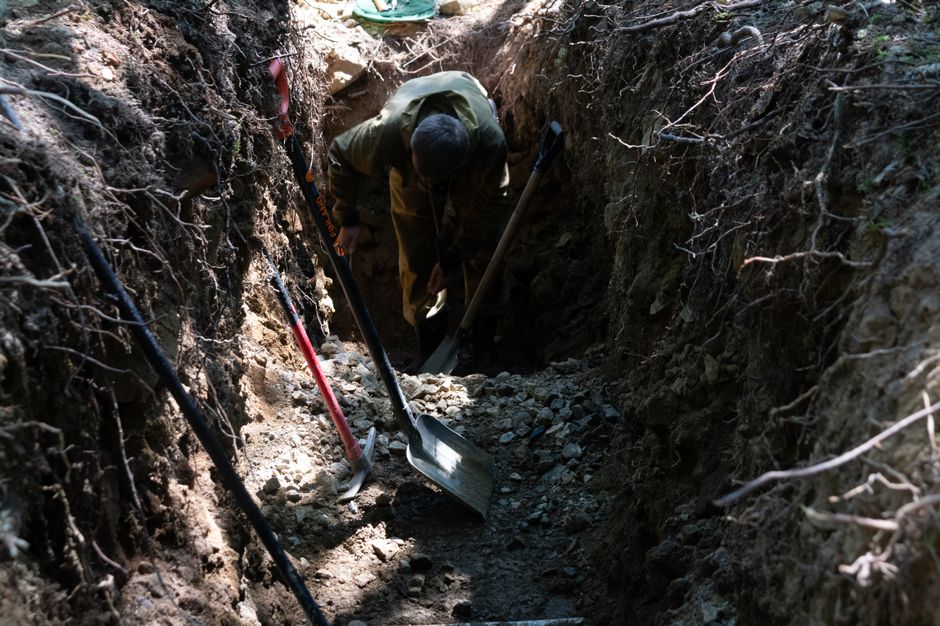
- Prepare the Trench (if needed): For most physical edgings (especially metal, aluminum, or rigid plastic), you’ll need to dig a shallow trench. Use a half-moon edger or a flat spade to create a V-shaped groove along your marked line. The depth of this trench will depend on your edging material and desired burial depth. For a spade-cut edge, aim for a 4- to 6-inch vertical cut.
- Position the Edging: Carefully place your chosen edging material into the trench. Ensure it follows the contours of your design. For flexible materials like plastic or rubber, you can bend them to create curves. For more rigid materials, you might need to use pre-formed curves or make relief cuts.
- Secure the Edging:No-Dig Plastic: For no-dig plastic strips, secure them with stakes or pins, typically spaced every 3 feet on straight runs and every 12-18 inches on curves to provide better resistance against frost heave and maintain the bed’s curvature.
- Metal/Aluminum: Drive stakes (often included with the kit) through pre-drilled holes or specific securing points. For interlocking systems, ensure sections are firmly connected to prevent horizontal separation.
- Stone/Brick/Pavers: These typically require a more substantial base, often a compacted layer of gravel and sand, and may be mortared in place for maximum stability.
- Achieve Proper Burial Depth: A critical aspect of effective edging is its burial depth. For most mulch beds, you want at least 3 inches of the edging below grade, with about a 1-inch lip remaining above the finished mulch surface. This creates a sufficient barrier to contain a 3-inch layer of mulch and block grass roots. For aggressive turfgrass, burying the edging 4-5 inches deep may be necessary.
- Backfill and Level: Once the edging is securely in place, backfill the trench on both sides with soil, tamping it down firmly to eliminate air pockets and stabilize the edging. Ensure the soil on the lawn side is level with the top of the buried edging to allow mowers to pass over easily.
Proper Mulch Depth and Spillover Prevention
After your edging is installed, the next step is applying mulch. The depth and placement of mulch are just as important as the edging itself for a healthy, tidy landscape.
- Optimal Mulch Depth: Aim for a consistent layer of 2 to 4 inches of organic mulch across your garden beds. This depth is ideal for weed suppression, moisture retention, and soil temperature moderation. Applying too little mulch (less than 2 inches) won’t provide these benefits effectively, while too much (over 4 inches) can suffocate plant roots, prevent water penetration, and encourage pest issues.
- Creating a Mulch Lip: To prevent mulch from spilling over your newly installed edging, ensure the top surface of your mulch layer is approximately 1 inch below the top lip of the edging. This creates a small “catch basin” that keeps mulch contained, even during heavy rain or strong winds.
- Avoiding Mulch Volcanoes: A common mistake, particularly around trees and shrubs, is creating a “mulch volcano” – piling mulch high against the trunk or stem. This traps moisture against the bark, leading to rot, fungal diseases, and insect infestations. Always pull mulch back 2 to 3 inches from tree trunks and shrub stems, creating a donut shape that allows the root flare to breathe.
- Water Drainage: Consider the natural contours of your bed. If you have any low spots or areas prone to water runoff, you might need to adjust your trench depth or edging height slightly to create a better catch basin and prevent mulch from washing out. Observing how water moves after a heavy rain can provide valuable insights for fine-tuning your edge.
Calculating Materials and Long-Term Edge Maintenance
Before purchasing your edging and mulch, accurate measurements are essential to avoid waste and ensure you have enough material to complete your project.
To calculate the linear footage of edging needed, measure the perimeter of all the garden beds you plan to edge. It’s always a good practice to add 10% to your total measurement to account for any cuts, overlaps, or unforeseen adjustments. So, for a 60-foot perimeter bed, you would need approximately 66 linear feet of edging.
For mulch, you’ll need to calculate the cubic yards required. A simple formula is: (Length in feet x Width in feet x Depth in inches) / 324 = Cubic Yards. For example, a 200 square foot bed covered with a standard 3-inch layer of mulch would require about 1.85 cubic yards.
Once installed, your landscape mulch edging isn’t entirely maintenance-free, but proper care will significantly extend its life and preserve its appearance.
Essential Maintenance Steps and Seasonal Edging Tips:
- Seasonal Recutting (for spade-cut edges): If you’ve opted for a spade-cut trench, plan to recut it once or twice a season, typically in spring and mid-summer, to maintain a crisp line and prevent turfgrass encroachment.
- Inspect for Frost Heave: In colder climates, plastic or even lighter metal edgings can sometimes lift out of the ground due to frost heave. Inspect your edging in early spring and gently tap any lifted sections back into place with a rubber mallet.
- Mulch Level Management: Periodically check your mulch depth. As organic mulches decompose, they settle. Top up your mulch to the optimal 2-4 inch depth as needed, usually annually or bi-annually, making sure to maintain the 1-inch lip below the edging.
- Weed Control: While edging helps, some weeds may still sprout. Regularly pull weeds from your beds, especially along the edge, to keep the area tidy.
- String Trimmer Care: When using a string trimmer near your edging, be mindful. Plastic edging can be damaged by trimmers, while metal or stone edging can provide a hard surface to trim against, helping to maintain a clean line.
- Post-Storm Check: After heavy rain, inspect your beds for any mulch displacement or erosion, especially on sloped areas. Adjust mulch and edging as needed to prevent future issues.
- Cleanliness: Periodically clean your edging, especially if it’s a visible material like stone or metal, to remove dirt or debris that can accumulate.
Frequently Asked Questions About Mulch Edging
We often receive questions about the best practices for landscape mulch edging. Here are some of the most common inquiries and our expert answers.
How deep should landscape mulch edging be installed to prevent weeds?
To effectively prevent weeds and grass roots from encroaching into your mulch beds, landscape mulch edging should be installed with at least 3 inches buried below grade. This depth creates a robust barrier against most turfgrass roots. Additionally, leaving a 1-inch lip above the finished mulch surface helps contain the mulch itself. For areas with particularly aggressive grass or deep-rooted weeds, burying the edging 4 to 5 inches deep can provide an even stronger deterrent.
What is the most cost-effective way to edge a mulch bed?
The absolute cheapest way to edge a mulch bed, in terms of material cost, is by using a spade-cut trench. This method requires no purchased materials, only manual labor with a half-moon edger or flat spade. However, it does require ongoing seasonal maintenance to recut the trench.
Among manufactured options, plastic no-dig strip edging is typically the most cost-effective, ranging from $0.50 to $1.50 per linear foot. While it has a shorter lifespan (5-10 years) compared to metal or stone, its low initial cost and easy DIY installation make it a popular budget-friendly choice. Recycled rubber edging also offers a relatively low material cost ($1.50-$3.00 per linear foot) with good durability.
How do you stop mulch from washing away during heavy rain?
Mulch washing away, especially on sloped areas, is a common problem. Here’s how to combat it:
- Proper Edging Installation: Ensure your physical edging is installed with a sufficient lip (about 1 inch) above the mulch level to create a barrier. If using a spade-cut trench, make sure it’s deep enough (2-3 inches) to act as a catch basin.
- Create a Drainage Contour: For sloped beds, consider creating a slight, subtle contour or mini-berm just inside your edging. This can help slow down water flow and encourage it to soak into the bed rather than rushing over the edge.
- Use Coarser Mulch Texture: Finer mulches are more prone to washing away. Opt for shredded bark, wood chips, or other coarser-textured mulches, especially on slopes. These materials interlock better, making them more resistant to displacement.
- Biodegradable Barriers: For new beds or areas with persistent wash-out, consider laying down biodegradable paper or cardboard underneath your mulch. This helps stabilize the soil, suppress weeds, and gives the mulch a more stable base.
- Avoid Over-Mulching: While it might seem counterintuitive, too much mulch can sometimes float and wash away more easily. Stick to the recommended 2-4 inch depth.
- Erosion Control Blankets: For very steep slopes, temporary erosion control blankets can be installed before mulching to provide immediate stability while plants establish or the mulch settles.
Conclusion
Effective landscape mulch edging is a fundamental element in creating and maintaining a beautiful, functional outdoor space. From defining crisp landscape borders that enhance curb appeal to ensuring the health of your garden by retaining moisture and suppressing weeds, the benefits are undeniable.
By carefully considering material options like durable aluminum, rustic steel, flexible recycled plastic, or timeless stone, and understanding proper installation techniques, you can achieve a professional finish that lasts. Whether you choose a cost-effective spade-cut trench or invest in a long-lasting physical barrier, the goal remains the same: a tidy, thriving garden that brings joy and boosts your property’s value. With the right edging and consistent maintenance, your garden beds will remain neat, healthy, and a source of pride for years to come.